Exploring the Suffolk Virginia Night Sky – Astronomy, Astrophotography, Telescopes, EAA – Planets and Stars and Nebula and Galaxies – Looking, Learning, Sharing… Let's see what we can see…
I was looking to learn something new and to try out some different options for astrophotograpy imaging command and control. I have been using KStars/Ekos/INDI to control my gear for both EAA and Astrophotography session. KStars/Ekos/INDI works great but I wanted to explore some other options. I have a few buddies who use the Nighttime Imaging ‘N’ Astronomy, or simply NINA, to control their gear and I wanted to learn a bit more about it. This post is an overview of the initial setup of NINA and other supporting components for equipment control using a Windows-based mini-pc.
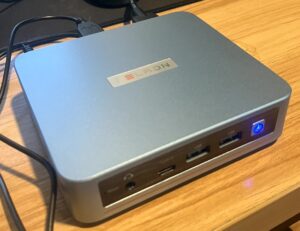
Unlike indi server which runs on a Raspberry Pi and Linux, NINA is an entirely different platform. NINA runs on a Windows PC and uses Windows device drivers or ASCOM drivers to connect to astronomy gear. I picked up this inexpensive Windows 11 Mini PC with 16 GB of RAM and a 512 GB M.2 SSD from Amazon.
The PELADN WI-6 Plus mini-pc is pre-installed with Windows 11 Pro, has a 4-core Alder Lake-N N95 processor, and supports up to 32 GB of memory. It is packed in a nice compact form-factor with 1 x USB Type-C, 2 x USB 2.0, and 2 x USB 3.0 ports and is powered by a 12 volt power supply. This mini pc definitely provides a sufficient platform for astrophotography command and control.
At first boot the OOBE Windows configuration wizard runs, Wifi gets configured, and Windows updates are installed. Once on the Desktop I installed Chrome. I mapped a drive (N:) to my NAS to store images from sessions. Then I enabled RDP (System Settings -> Remote Desktop). With RDP enabled I can disconnect the monitor, keyboard, and mouse. I can now access the mini-pc remotely from my primary Desktop using RDP. I connected up the USB connections for the Cameras (primary and guide), mount, EAF (connected via the hub in the ASI Camera), and USB GPS.
TL;DR Links to all the astronomy software I downloaded and installed to get NINA up and running with my equipment:
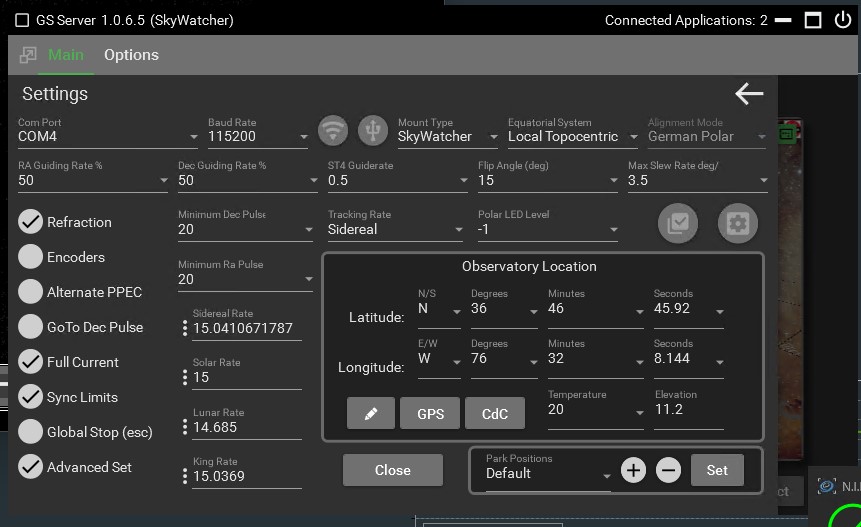
I collected and installed all the drivers I needed for my equipment. GSS (Green Swamp Server) is an ASCOM driver which supports the Synta Protocol used by SkyWatcher and Orion mounts, like my EQ6-R Pro Mount. Once installed I configured the GSS with the COM port and baud rate (115200). ZWO Drivers – ZWO Camera Drivers and ZWO ASCOM Drivers. The native driver for my ZWO ASI 294MC Pro camera is used, and the ASCOM driver is used for the ZWO EAF. Orion SSAG – OSSAG Driver and OSSAG ASCOM Drivers for my guide camera.
Downloaded and installed Stellarium Planetarium Software.
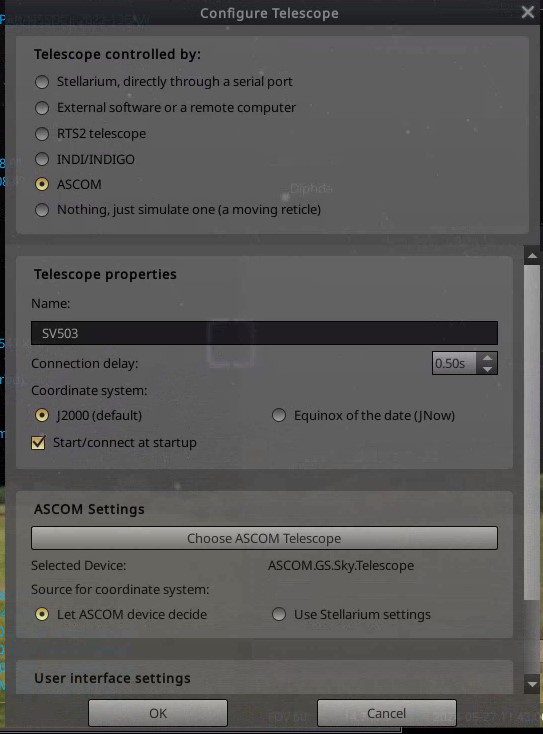
Start Stellarium and open the Configuration Window (F2). In the Plugins Enable the Telescope Control Plugin and Remote Control Plugin. Configure these plugins to Load at startup. Restart Stellarium. From the telescope menu (Ctrl-0) give the telescope a name, configure the control type (ASCOM), select the ASCOM telescope (ASCOM.GS.Sky.Telescope for GS Server),and set the connect at startup.
Installed PHD2 – Push Here Dummy Guiding. Configured the Equipment Profile (Guide -> Connect Equipment) for my Orion StarShoot Autoguider camera and ASCOM GS Sky Telescope Mount.
In the Guide -> Advanced Settings I set the search region to 32, enabled Use multiple stars, and set the focal length to 240 mm (the focal length of my guide scope). I hit the connect all button on the Connect Equipment window to test the camera and mount connections. Then created a dark library (Darks -> Dark Library…)
Download and install ASTAP which provides the astrometric solver for plate solving in NINA. I downloaded and installed the Large Star Database (D50). No other configuration is required.
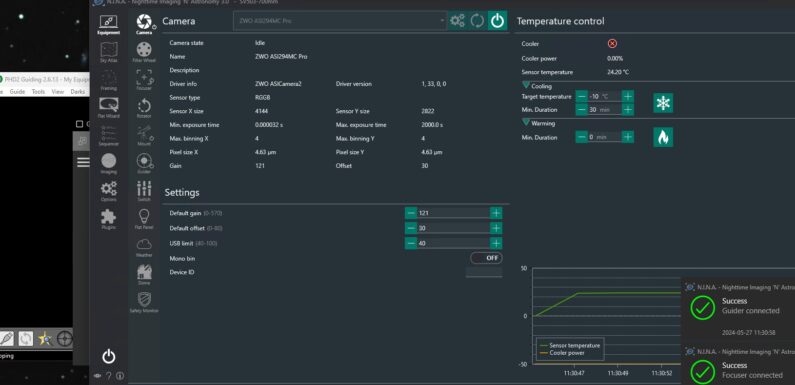
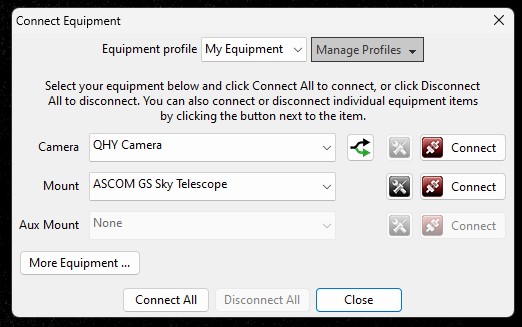
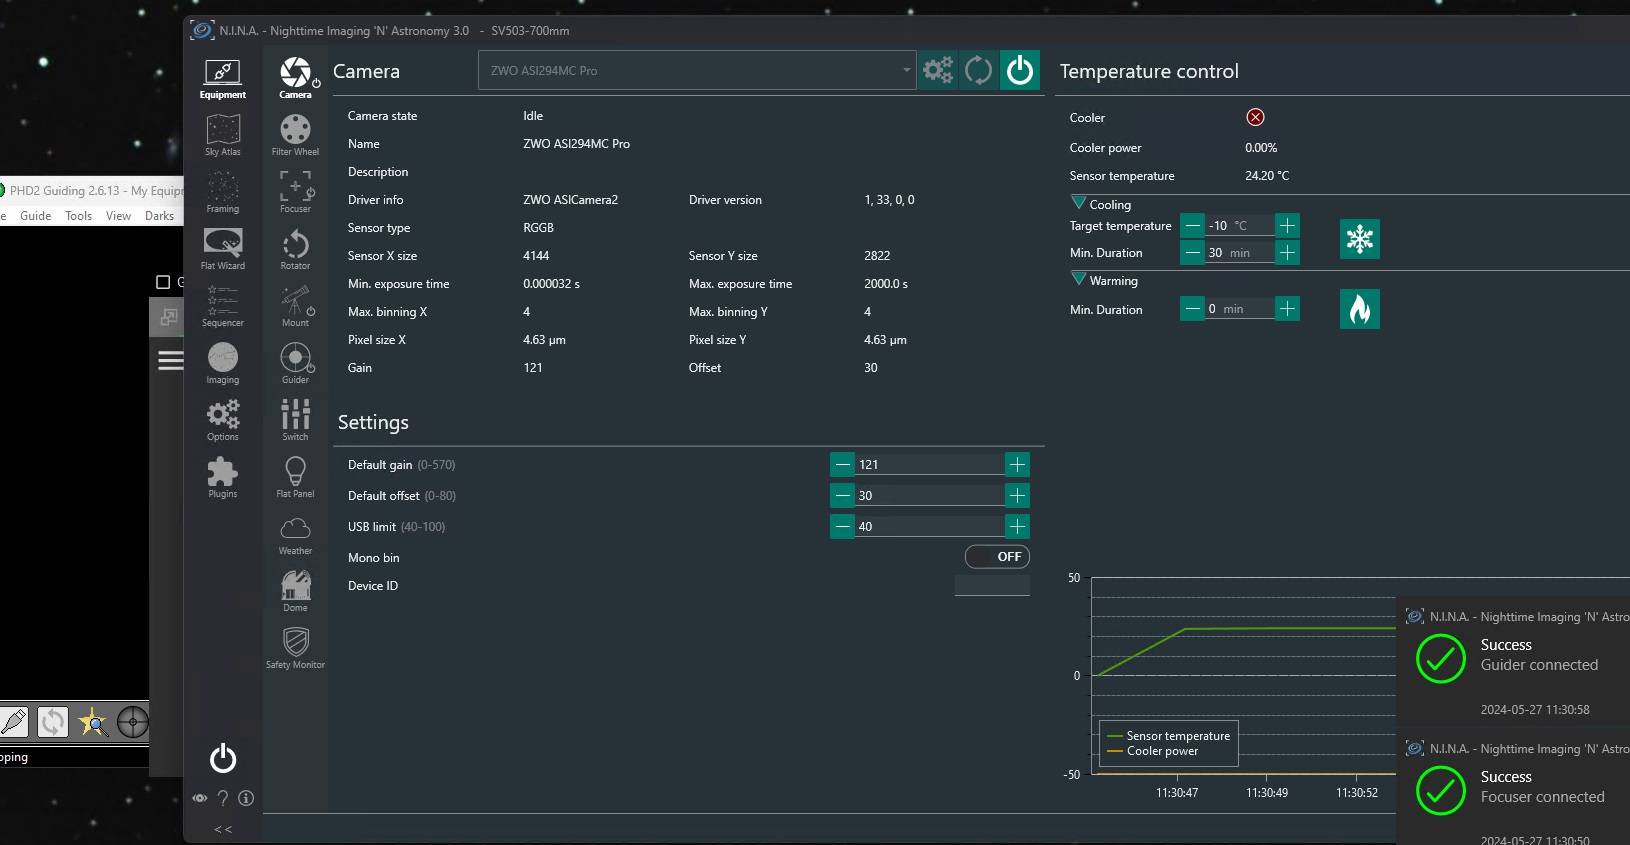
Finally download and install NINA – Nighttime Imaging ‘N’ Astronomy. I created a profile for my SV503 102ED scope without the Focal Reducer (700mm F/7) and configured the equipment: Camera, Focuser, Mount, and Guider. Once I had all the equipment configured I created a copy of the profile and set it up for the SV503 102ED with the Focal Reducer (571mm F/5.6).
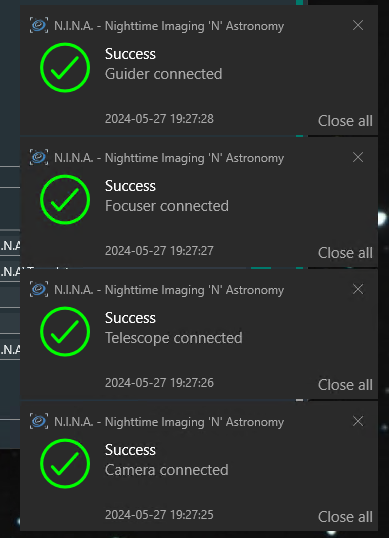
Start PHD2, then hit the connect button in NINA. Success messages will be displayed as each piece of equipment is connected.
I tested the equipment connections with both profiles.
All the equipment is connecting up and working as expected. NINA has a lot more knobs to turn than KStars/Ekos/INDI, but it was pretty easy to figure out. Started playing around with NINA’s advanced sequencer, but that will be another post. Now I just have to wait for a clear sky to apply what I have learned so far and capture some photons… hopefully soon…
Do you use NINA for your Astrophotography sessions? Got any good tips/tricks? Share them in the comments!