Exploring the Suffolk Virginia Night Sky – Astronomy, Astrophotography, Telescopes, EAA – Planets and Stars and Nebula and Galaxies – Looking, Learning, Sharing… Let's see what we can see…
First light and a chance to test out my sequence using the NINA mini-pc build sequencer on 5/31/2024 shooting M 94, the Cat’s Eye Galaxy. The NINA sequencer is somewhat complicated but extremely versatile. There really is a lot to this astrophotography tool… it is complex but it is fairly intuitive, so it does not take long to start to figure things out. In this post I’ll provide an overview of the NINA sequence I set up and how it works.
N.I.N.A. or NINA, Nighttime Imaging ‘N’ Astronomy, is a free opensource astrophotography software platform. NINA provides a set of astrophotography tools for framing, focusing, centering, and imaging light from far away. NINA includes a sequencer to completely automate an astrophotography imaging session from beginning to end.
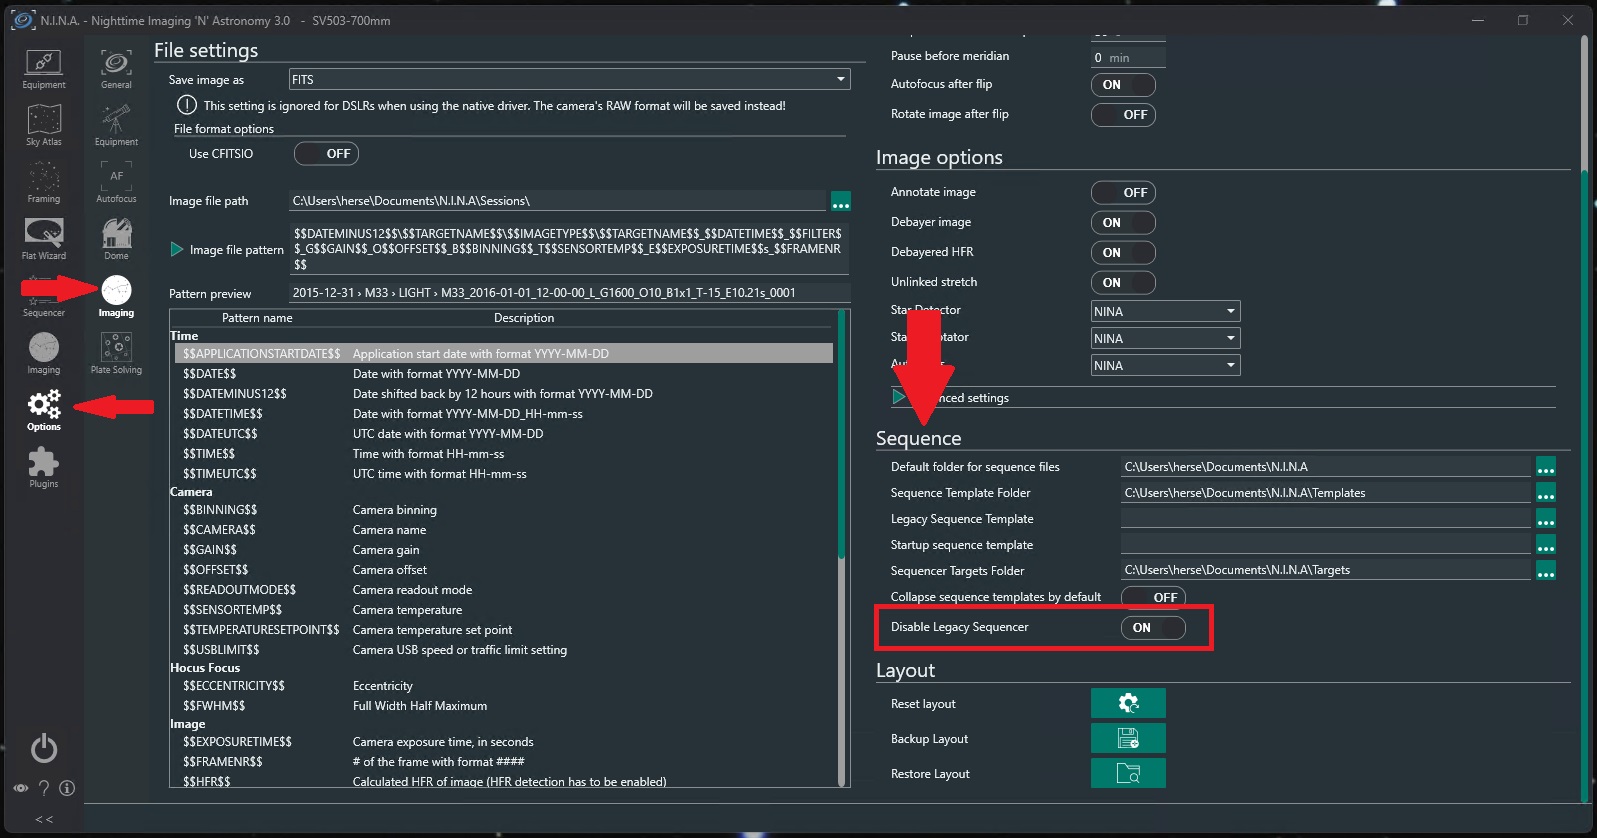
The NINA Advanced Sequencer Documentation can be found here. To avoid confusion between the NINA Legacy Sequencer and the NINA Advanced Sequencer, disable the legacy sequencer in Options -> Imaging -> Sequence.
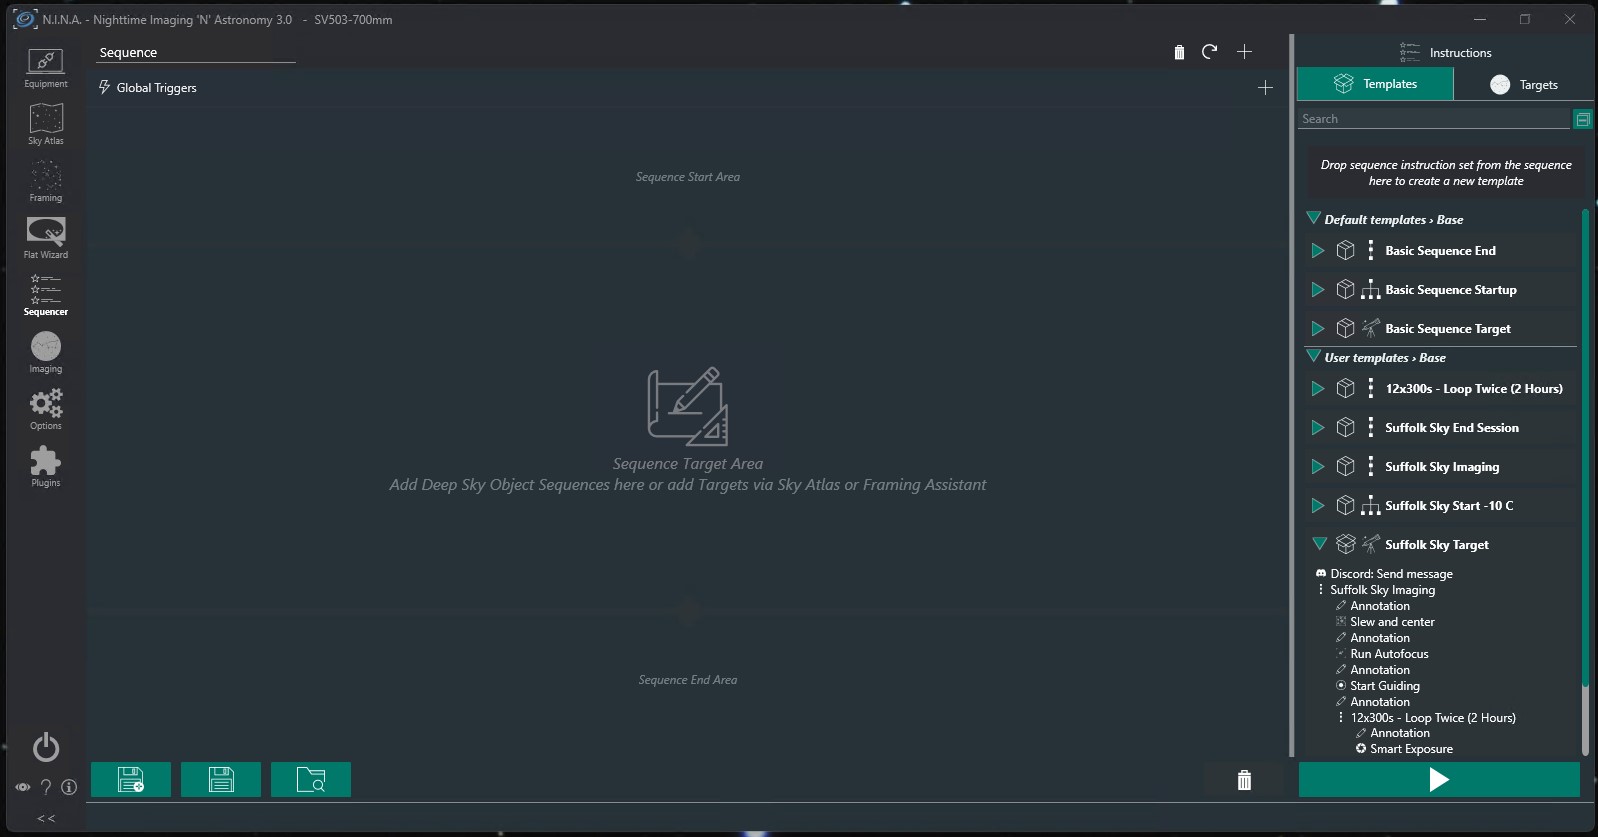
The NINA Advanced Sequencer is separated into 3 different areas: the Sequence Start Area, the Sequence Target Area, and the Sequence End Area. Within each area you can add instructions or containers of instructions. There are 3 types of containers: Sequential where instructions are executed in the order they are written, Parallel where instructions are executed all at once, and Object which includes target information.
Within each a container there can be triggers, loop conditions, and instructions. Containers can be saved as templates so the containers can be easily reused across sequences. Instructions, Templates, and Targets can be added to the sequences by dragging them from the right side menu into the sequence area. Sequences are saved as a JSON file.
The NINA Advanced Sequencer JSON for the sequence in this post can be downloaded here:
The Suffolk Sky NINA Sequence requires two additional NINA plugins: the Remote Copy plugin and the Discord Alert plugin. The plugins can be installed directly from the NINA Plugins interface and will require a restart on NINA after the installation.
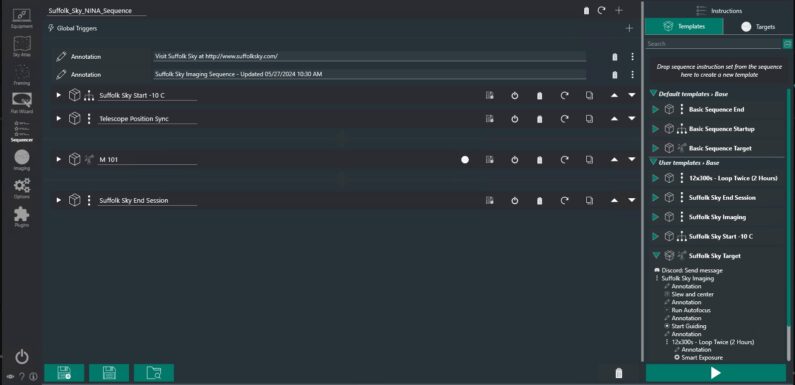
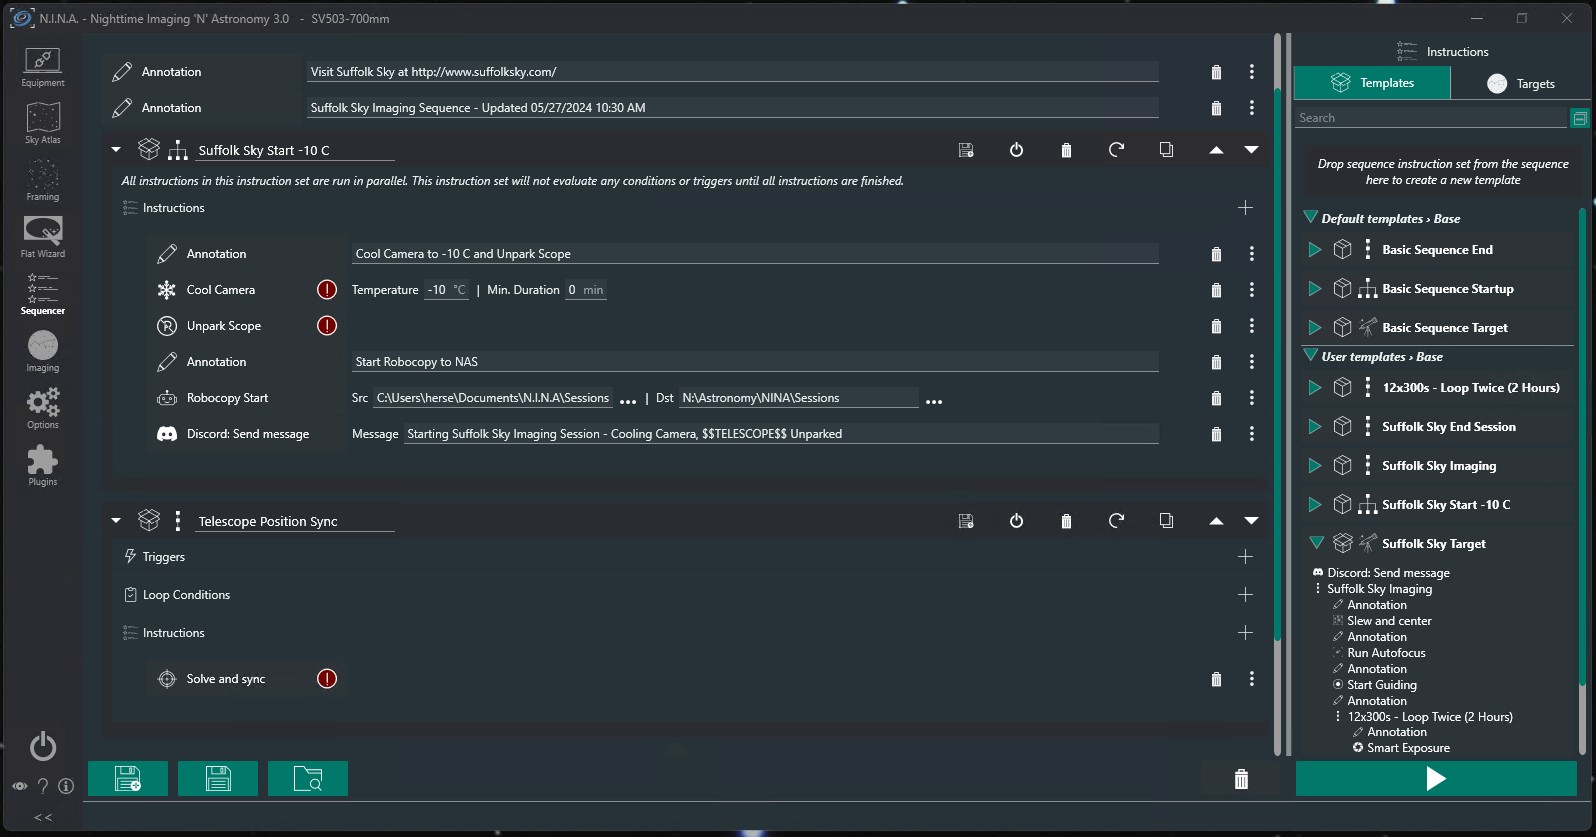
This screenshot is the overview of my basic Suffolk Sky imaging sequence with the containers in each of the sequence areas.
The Sequence Start area contains a Parallel and Sequential container, the Sequence Target area contains a single Object container, and the Sequence End Area contains a Single Sequential container. Within the Object container there are nested containers with imaging and exposure instructions.
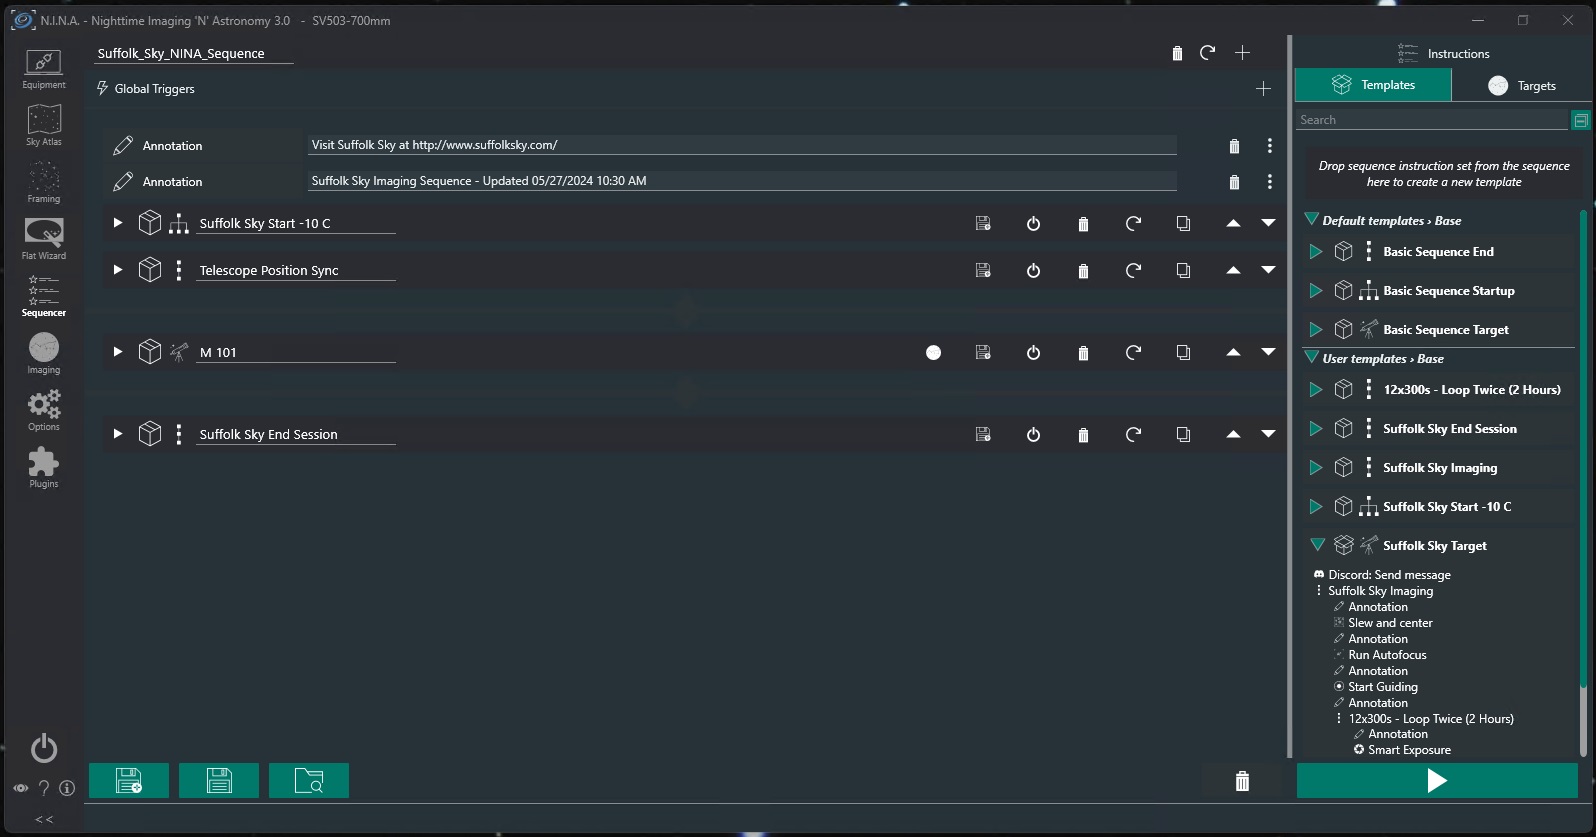
In the Sequence Start area of the Suffolk Sky Sequence a parallel sequence is executed to cool the Camera to -10 C, unpark the mount, start Robocopy to move images from the local session folder to the NAS, and send a message to my Discord server that the session has started. Then a sequential container has the solve and sync performed to set the current position of the telescope. That is the only instruction in the sequential container, but others can be added as needed.
The red ! are there since the equipment is not currently connected. If I attempted to run the sequence without the equipment connected it will also warn me that these instructions will not work.
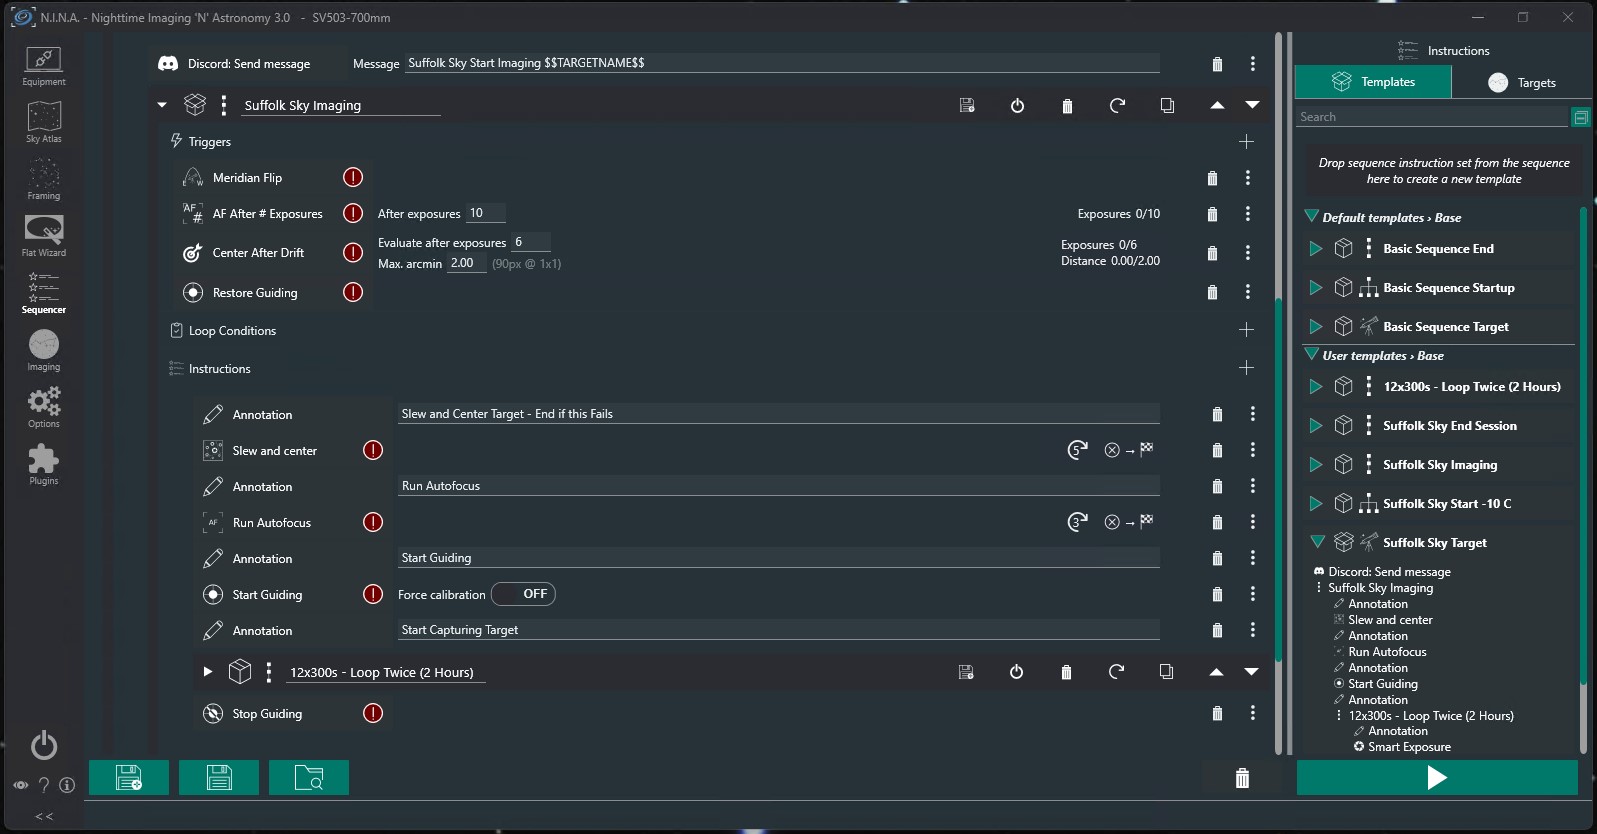
In the Sequence Target Area there is a single Object container, M 101 in this example. Additional Object containers could be added to capture multiple objects during an imaging session. The sequence starts by sending a message to my discord server that imaging is starting on the selected target. The Object container has information about the object and a nested Sequential container with instructions to slew and center on the configured target, Autofocus, Start Guiding, and then another nested sequential sequence with the capture instructions. Finally once all is complete, Stop Guiding. I put the Stop Guiding as part of this sequence instead of in the End Sequence Area since there could potentially be multiple objects.
There are also triggers configured as part of this sequence. These triggers are evaluated while the sequence is running: A meridian flip will be performed if the object crosses the meridian, Autofocus will be performed every 10 exposures, the objects position in the FOV will be evaluated after every 5 exposures and will be recentered if it has drifted more than 2 arcmin, and guiding will be restored if it is interrupted.
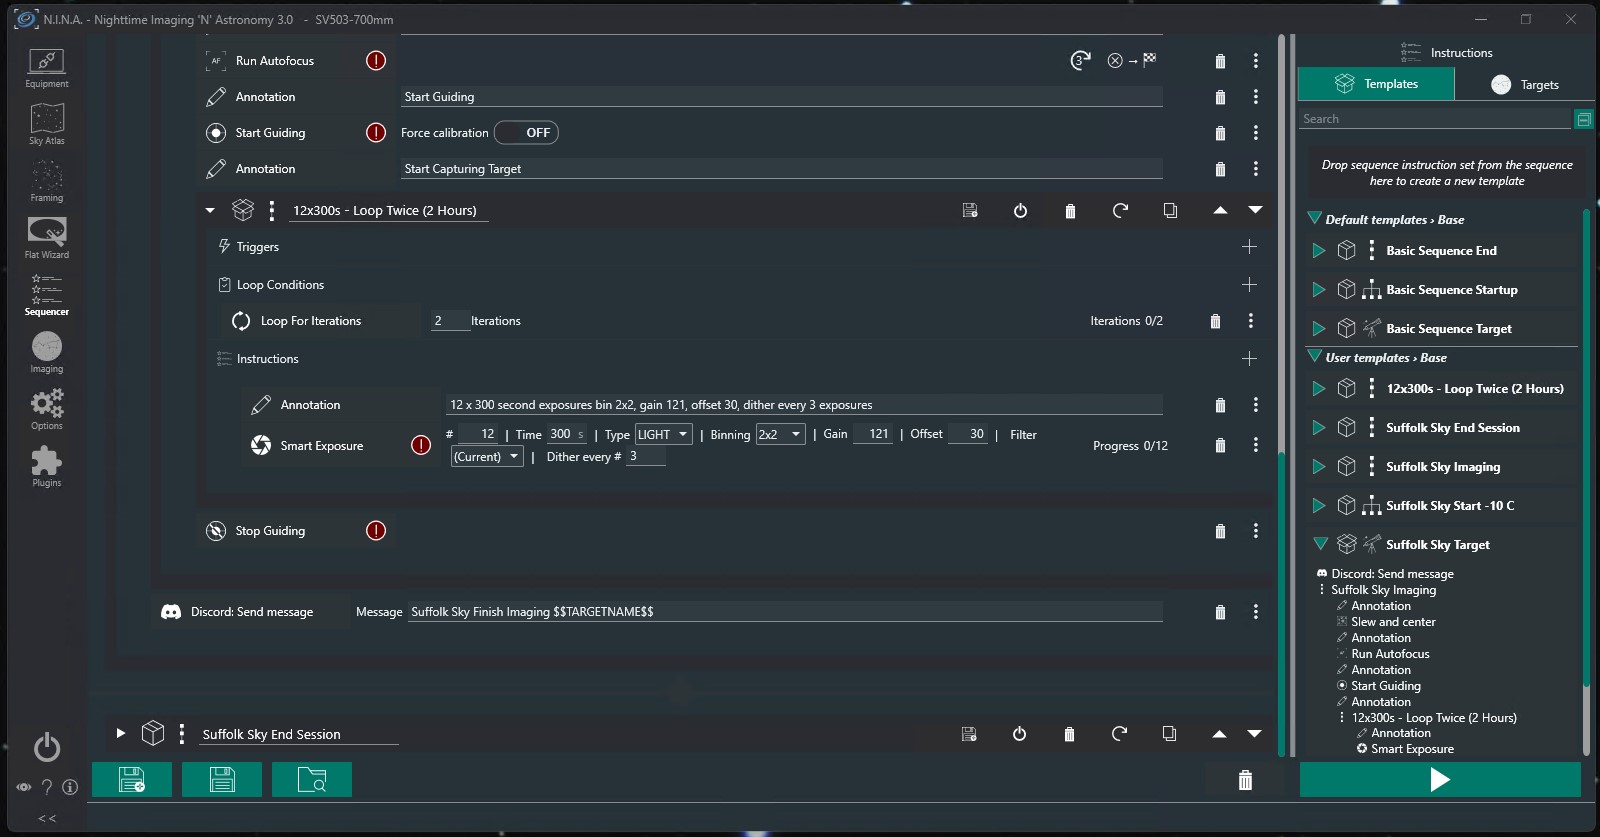
Within the imaging sequence there is a nested Sequential container which has the Smart Exposure instruction. This Smart Exposure instruction is configured to take 12 x 300 second exposures (1 hour) at bin 2×2, gain 121, offset 30, dithering after every 3 exposures.
There is a loop condition to loop this container for 2 iterations, so capture a total of 24 x 300 second exposures (2 hours). If I wanted to add additional hours I can just update the number of iterations to loop. After the nested container instructions complete a message is sent to the discord server that imaging of the configured object has completed.
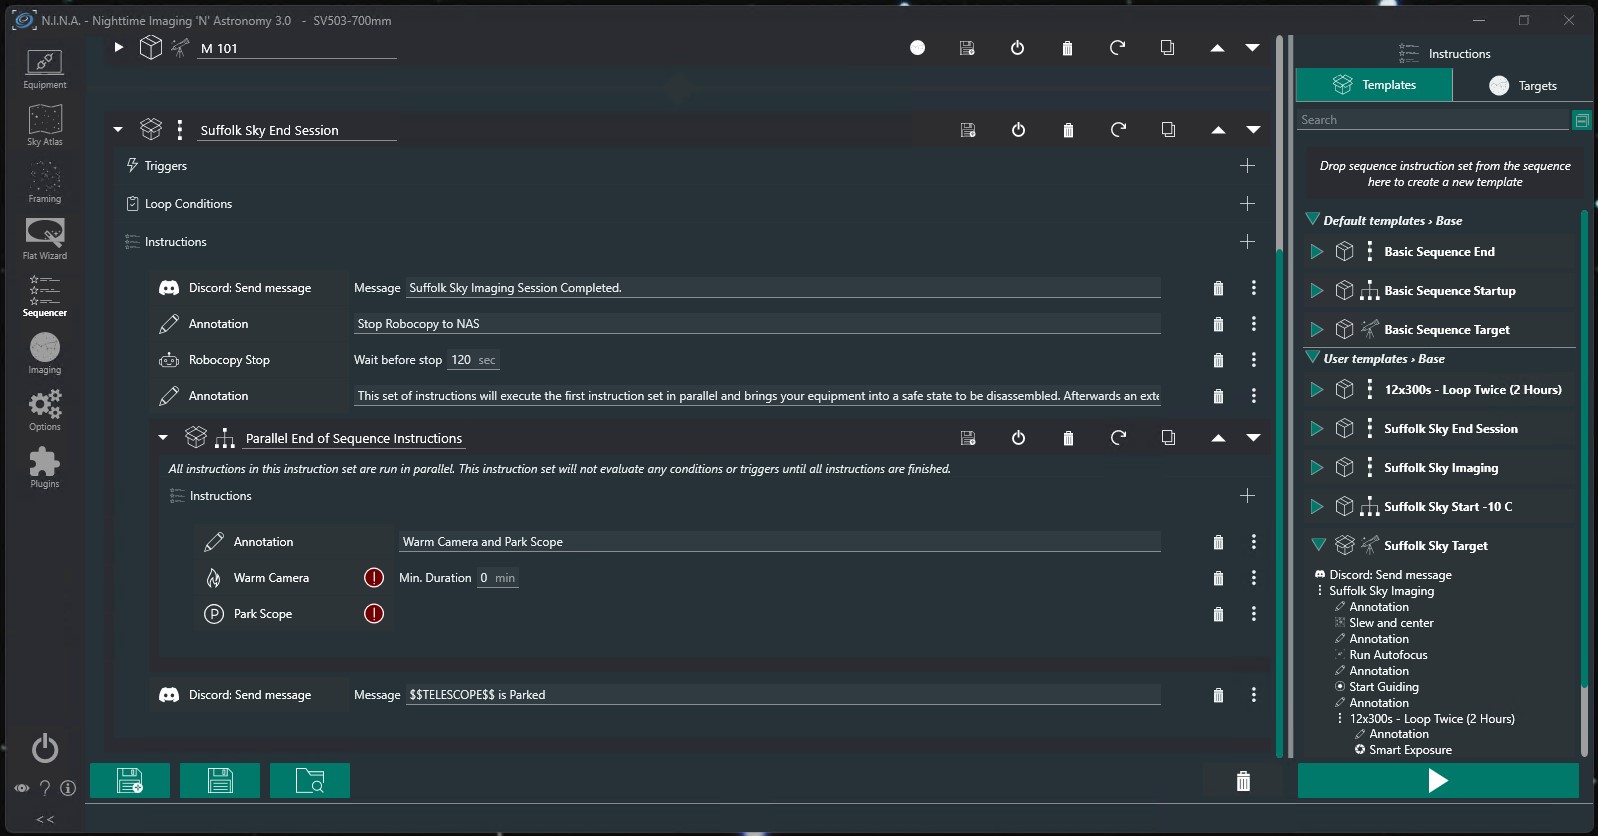
Once the all the instruction sets in the Sequence Target area have completed, the instructions in the Sequence End area are executed. For the Sequence End I have a Sequential instruction set which contains a Parallel instruction set. A discord message is sent to notify that the imaging session has completed and the Robocopy is stopped. There is a 120 wait to ensure all images have been transferred to the NAS.
Once the wait finished the Parallel instructions are executed to warm the camera and park the scope. Finally a discord message is sent notifying that the scope has been parked.
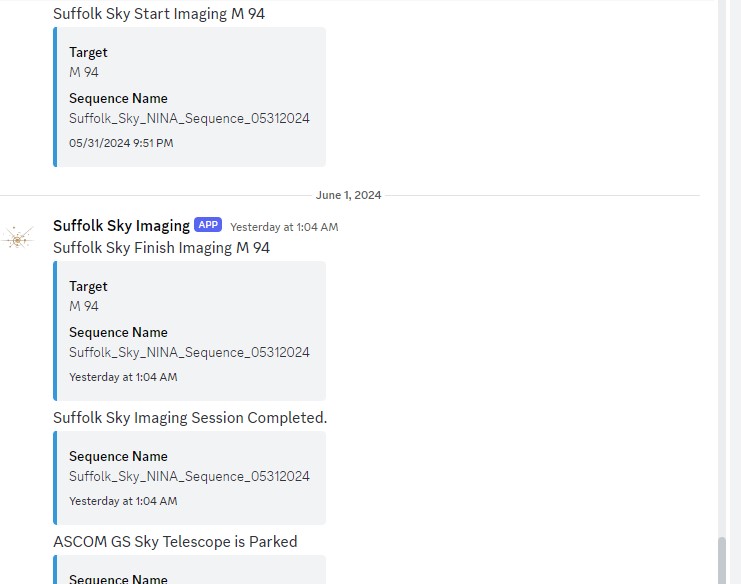
During the sequence run imaging M 94 the discord messages worked like a charm.
Join my Discord server to see when I am observing and to discuss Astronomy and other hobbies with other folks from Southeastern VA and beyond.
The NINA Advanced Sequencer worked fantastic shooting it’s first target I am sure there are some improvement I can make to my sequence as I am still learning all the capabilities. Looking forward to learning more about NINA’s features, functions, and capabilities. Hope you found something helpful in this post. I’ll keep sharing my experiences here. Clear skies…
If you are looking for a step-by-step walk-through creating a sequence using NINA’s Advanced Sequencer here is a fantastic tutorial from Patriot Astro.
Patriot Astro has a bunch of other great NINA tutorial on his YouTube channel. Definitely some great content and worth a look.