I stumbled upon this open source project, seestar_alp, which allows remote control of a SeeStar S50 using a web interface called the Simple SeeStar Controller (SSC) running on a Raspberry Pi (there are options for Windows and Mac as well). The Simple SeeStar Controller allows for control of the SeeStar through a web browser without needing the SeeStar app running on an IOS or Andriod device. SeeStar Alp also integrates with Stellarium to provide a sky atlas to use with the SeeStar. Seemed like an interesting project so I figured I would give setting it up a go. In this post I’ll dig into the details on building/setting up the Raspberry Pi, installing the SeeStar Alp software, accessing the Simple SeeStar Controller (SSC), and integrating Stellarium and the SSC.
The SeeStar S50 is a fantastic smart telescope which provides a quick, simple, and inexpensive way for anyone to enjoy the hobby of amateur astronomy from their tablet or mobile phone. It is pretty awesome right out of the box, but if you want to do a bit more tinkering then the Seestar ALP Simple SeeStar Controller (SSC) enhances the capabilities of the SeeStar by providing command, control, and scheduling of the SeeStar smart telescopes.
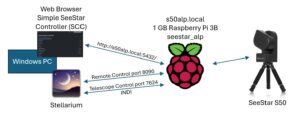
Here is a basic diagram of how things are connected and communicating. The Windows PC, Raspberry Pi, and SeeStar are all connected to the same wireless network.
Building the Raspberry Pi
I created a fresh Raspberry Pi build using a 1 GB Raspberry Pi 3B board I had laying around by imaging Raspberry Pi OS Lite (64 bit) on a SD Card using the Raspberry Pi Imager. In the Raspberry Pi Imager I applied OS customization to set the hostname to s50alp, to configure the wireless network, set up the locale (time zone and keyboard layout), and ensure the SSH service is enabled.
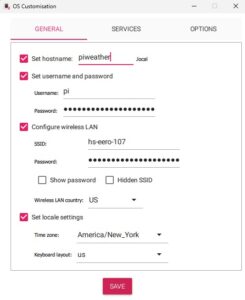
Once the SD card was imaged I installed it and booted up the Raspberry Pi. Verified network connectivity over my wireless network and connected via SSH. As is a good practice with any new build I updated the system using sudo apt update and sudo apt upgrade.
Installing the SeeStar Alp Software
Setup seestar_alp per the instructions for Raspberry Pi found here by running:
curl -s https://raw.githubusercontent.com/smart-underworld/seestar_alp/main/raspberry_pi/setup.sh | bash
The setup installs all the required dependency packages, creates the python virtual environment, and installs the necessary python modules. It clones the seestar_alp software from github. It sets up systemd to start seestar_alp at boot. Finally it starts the seestar_alp service.
Verify Seestar Alp is running using systemctl status seestar

Accessing the Simple SeeStar Controller (SSC)
My SeeStar is configured in Station Mode to connect to my wireless network, the same wireless network the Raspberry Pi running SeeStar Alp is connected to. I powered on the SeeStar and waited for the “Ready to Connect” voice prompt.
My host name for the Raspberry Pi is s50alp, so after the SeeStar is powered on I can point my browser to the address http://s50alp.local:5432/ to connect to the Simple SeeStar Controller (SSC) interface.
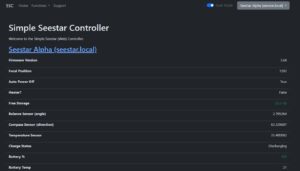
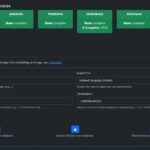
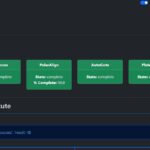
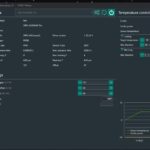
The SSC Home screen displays details about the currently connected SeeStar(s). From Home you can switch between SeeStars (if you have multiple SeeStars connected), access the different functions, or enable/disable Dark Mode.
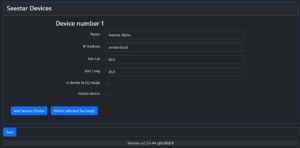
To change the SeeStar connection settings or to add multiple SeeStars this is done in the SSC -> Functions -> SSC Config.
The SeeStar Alp log is located at ~/seestar_alp/logs/alpyca.log. If the SeeStar is not connecting it is displayed in the log:
2025-01-06T14:49:04.281 INFO HeartbeatMsgThread:Seestar Alpha RECONNECTING Seestar Alpha

2025-01-06T14:49:05.823 ERROR ALPMainThread DevNotConnectedException: device not connected.

2025-01-06T14:49:06.738 ERROR SocketHeartbeatMessageThread.Seestar Alpha connect socket error: [Errno -2] Name or service not known
A successful connection to a SeeStar looks like this in the log:
2025-01-06T14:50:28.348 INFO IncomingMsgThread:Seestar Alpha RECONNECTING Seestar Alpha

2025-01-06T14:50:29.469 INFO SocketHeartbeatMessageThread.Seestar Alpha connected

2025-01-06T14:50:29.505 INFO IncomingMsgThread:Seestar Alpha received : {'Event': 'Client', 'Timestamp': '28.663266300', 'connected': ['192.168.7.214'], 'master_index': 0, 'is_master': True}

2025-01-06T14:50:30.118 INFO IncomingMsgThread:Seestar Alpha received : {'Event': 'FocuserMove', 'Timestamp': '29.251504177', 'state': 'complete', 'lapse_ms': 1553, 'position': 0, 'route': []}
From the Functions menu you can access the command, control, and configuration of the connected SeeStar(s).
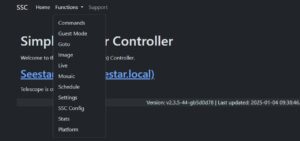
- Commands – Send commands to the SeeStar (Startup, alignment, open arm, park, restart, autofocus, etc…)
- Guest Mode – Guest mode settings for the SeeStar
- Goto – Slew to a target
- Image – Image a single target
- Live – View a live image from the SeeStar
- Mosaic – Set up a Mosaic capture
- Schedule – Schedule targets to be imaged
- Settings – SeeStar settings
- SSC Config – Simple SeeStar Controller configurations – Location (lat/lon), Stellarium Host, SeeStar Setup
- Stats – Version, level, temperature, battery %, and other information.
- Platform – Restart SSC/Alp services, reboot or shutdown the Raspberry Pi
I plan to write posts detailing using each of these functions… stay tuned.
Get Target Coordinates from Stellarium
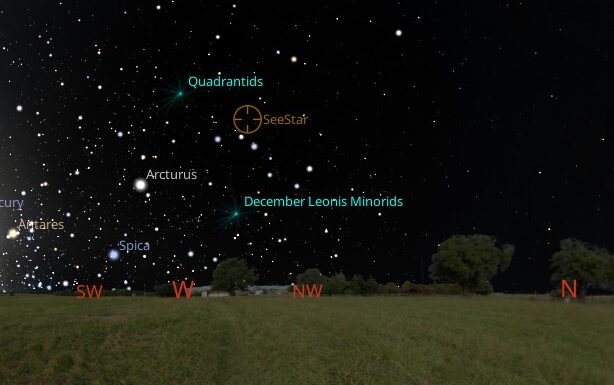
Stellarium is a free open source planetarium program which allows you to explore a realistic sky in 3D. SeeStar Alp can be integrated with Stellarium so that RA/DEC coordinates of targets selected in Stellarium can be imported into the SSC.
First set the Stellarium Remote Control Plug-in to Load at startup. Restart Stellarium and configure the Remote Control Plug-in to Enable automatically on startup. I am using the default port 8090.
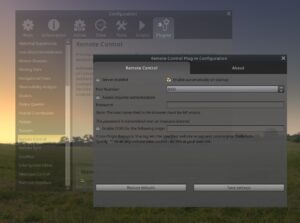
Restart Stellarium and the Remote Control Plug-in Server will be enabled.
In the SSC -> Functions -> SSC Config menu set the Stellarium host to the IP address of the machine Stellarium will be running on (the wireless network IP address of my Windows PC) and configure the port of the Stellarium Remote Control Plug-in (the default is 8090).
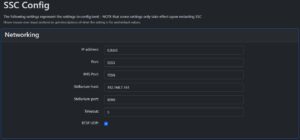
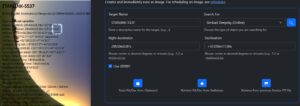
In SSC on the Goto, Image, and Mosaic functions the Retrieve RA/DEC from Stellarium can now be used to get the coordinates for an object which is selected in Stellarium.
SeeStar Location Display and Slewing in Stellarium
I had to install an earlier version of Stellarium, version 23.4. The latest version, Stellarium 24.4, did not have the option to configure INDI/INDIGO in the Telescope Control Plug-in. To configure a telescope connection first you need to set the Telescope Control Plug-in to Load on startup and restart Stellarium.
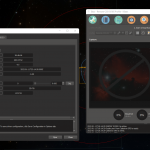
Once Telescope Control plug-in is enabled, add a new telescope and configure it to use INDI/INDIGO, give it a name, and set the Coordinate system to Equinox of the date (JNow). Configure the INDI Settings with the hostname of the Raspberry Pi and the TCP port 7624 (the default). Click the Refresh devices button and the SeeStar will be displayed in the devices.
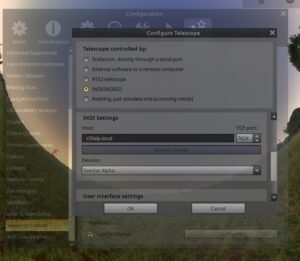
Click OK and then Connect to connect Stellarium to the SeeStar through the INDI Server running on the Raspberry Pi. Once connected the location where the SeeStar is currently pointed will be displayed in Stellarium.

I can use the Sellarium Telescope Control to slew the SeeStar to or sync the SeeStar on an object selected in Stellarium.
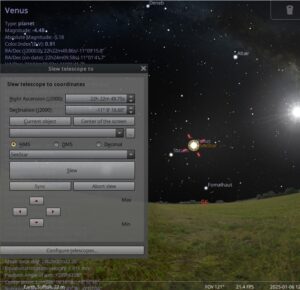
This is definitely a very interesting open source project. It was also fairly easy get SeeStar Alp up, running, and working to control the SeeStar. I have been testing connectivity and functions in my office. Looking forward to giving SeeStar Alp a try during a live observing session. Stay tuned…
More info on SeeStar Alp project can be found here: https://github.com/smart-underworld/seestar_alp
Stellarium can be downloaded from here: https://stellarium.org/
The Raspberry Pi Imager can be found here: https://www.raspberrypi.com/software/
SeeStar Alp can be run directly from a Windows machine, I’ll probably give that a try in the near future.
Grab the bits, fire up the SeeStar, and have fun tinkering with it. If all else fails… connect up to the SeeStar app and enjoy the views 🙂
Clear skies…

