I have had my Astro-Tech AT66ED for a good long while (I think I got it back in 2009 or so). It is a great little scope, but unfortunately it has been in the case for a couple years (pretty much since I got the 102). I decided to set it up to do some wider field nebula captures. Looking to get some time on the Heart Nebula, the Veil Nebula, the North American Nebula, the Pleiades, and a few others which are a bit too expansive to fit in the FOV of the 102 even with the .8 focal reducer.
I want to be able to swap between the Astro-Tech AT66ED and SVBONY SV503 102ED without having to completely disassemble and reassemble. Ultimately I would want to be able to loosen up the dovetail saddle on the EQ6 and swap out the scopes without having to do a bunch of reconfiguration. The easier it is to switch between the scopes the more likely I am going to switch between the scopes.
The one component which is probably the most difficult (IMHO) to move between scopes is the Electronic Automatic Focuser (EAF). To move it would require removing several screws, loosing some grub screws, re-attaching, aligning, and re-configuring the driver to match the scope (zero and max)… all of this would be a bit of a pain.
I ordered a Gemini Electronic Auto Focusers from eBay, so I could have a dedicated EAF on the AT66ED. The Gemini EAF is less than half the price of a ZWO EAF and most of the reviews I have read have been pretty positive. The focuser shipped from China and it took a couple weeks to arrive via USPS.
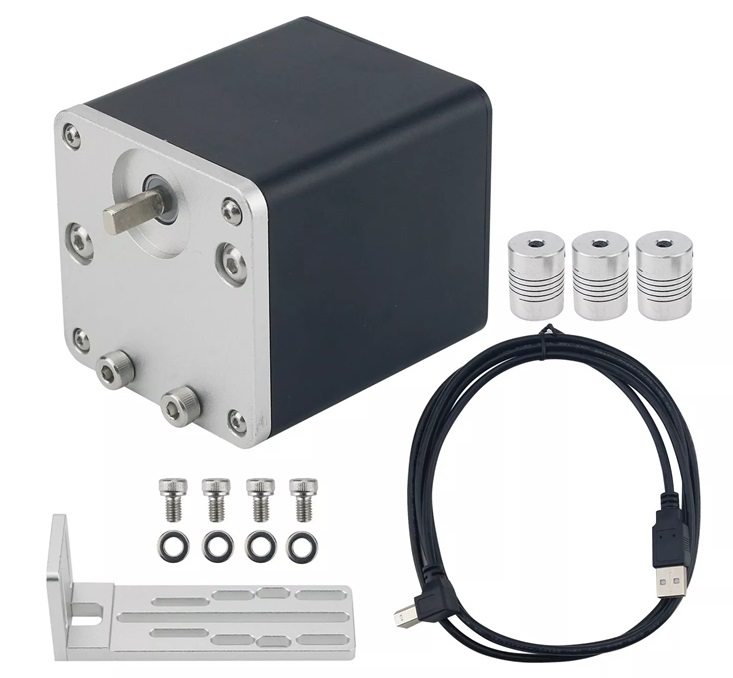
Installation is similar to the ZWO EAF. Move scope focus all the way in (this will be your zero point), remove the coarse focus knob from the AT66ED, add the coupler to connect the Gemini EAF to the focus shaft, attach the bracket and align, and then tighten everything down. Don’t fully tighten everything up until you have the bracket, EAF, and coupler aligned – this may take a bit of fiddling. Like the newer version of the ZWO EAF, the Gemini Auto Star Focuser is powered from USB so just a single USB cable is needed.
Cabled up the Gemini EAF and installed the ASCOM Driver for it on the mini-PC. Tested the connection in NINA.
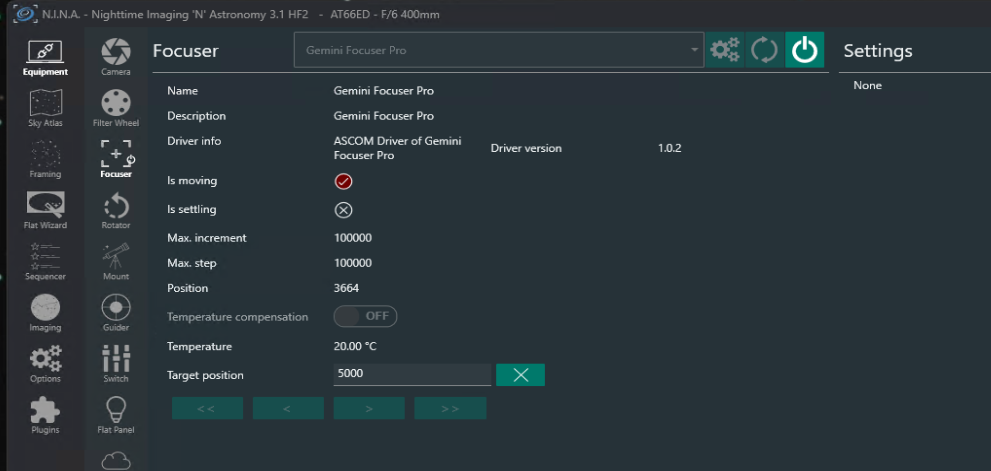
All worked as expected. I was able to set 0 in the ASCOM driver configuration and move the focuser in and out through NINA. I configured the initial backlash compensation in NINA to 60, will take some focus testing to dial this in. The current position survives disconnects and power offs as it should. I’ll write up a post on setting up zero and configuring the backlash compensation once I am able to test getting focus with the Gemini Auto Star Focuser.
I am using the adjustable UA Field Flattener in this setup. Since the AT66ED is kind of weird with SCT threads on the back of focuser, instead of something more standard like M48, I had to pick up a SCT to M48 adapter in order to connect the field flattener to the scope.
I set up 55mm of spacing between the flattener and the camera using a 16.5mm spacer, the ZWO filter drawer (21 mm), a 11mm spacer between the filter drawer and the camera, and then 6.5mm in the camera to the sensor( 16.5mm + 21mm + 11mm + 6.5mm = 55mm). The UA Field Flattener is adjustable for the backspacing and I set it at 55mm, cause that is what we have 🙂 I am going to pick up some more spacers so I don’t have to move these between the scopes as well. Then I’ll just be able to unscrew the camera from one image train and screw it into the other.
I also wanted the AT66ED to have it’s own dedicated guide scope, so I don’t have to transfer the SVBONY SV106 60mm from the 102. The SVBONY SV165 30mm guide scope should work great for this setup.

I 3D printed a Dew Shield for the SV165 using this STL from Thingiverse but not sure if I am going to use it. The OSSAG guide camera will likely stay with this setup and I plan to pick up another guide camera (probably a ZWO ASI120MM) for the 102ED’s guide scope. That way I won’t have to fiddle with focusing the guide camera when I switch it out.
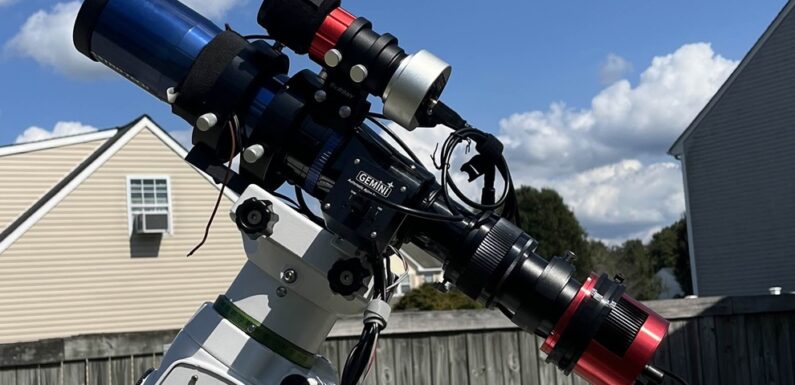
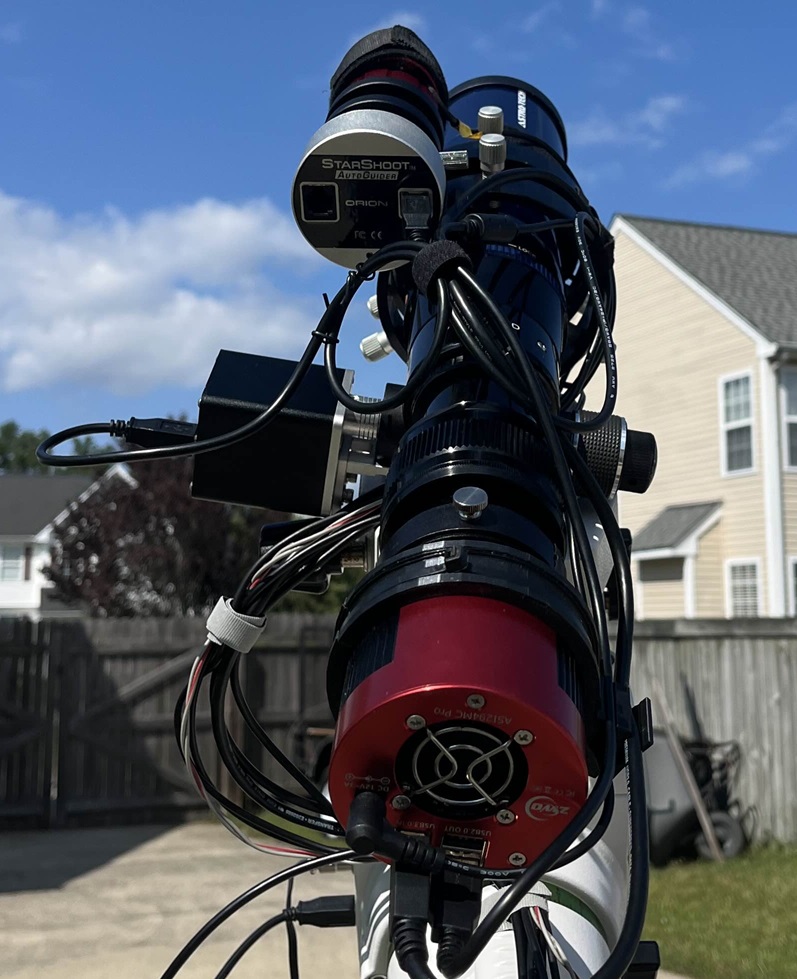
Mounted the AT66ED on a 8″ (210mm) SVBONY SV219 Dovetail Mounting Plate using some ADM rings. Had to tinker with a few different mounting configurations to get the Gemini EAF to clear the saddle and to get everything to balanced. Got everything cabled up pretty nice.
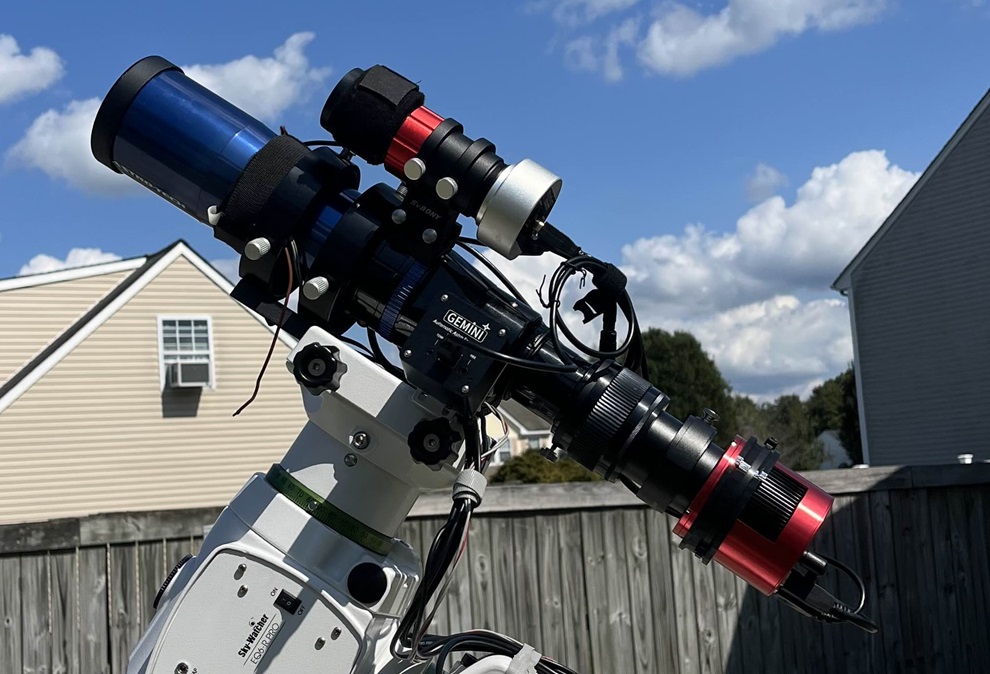
Looks great up on the EQ6-R and after a bit of tinkering I was able to get everything balanced nicely. I am going to get some new dew-heating strips so I do not have to transfer those between the two set-ups… that will also save a bit of frustration.
Of course I finished balancing and testing functionality just before the sky clouded up pretty solid. Was hoping to at least have a couple of holes in the clouds to do some focus testing… but nope.
The forecast looks pretty bleak for the several nights, but maybe we will get lucky. Fingers crossed for clear skies. Looking forward to shooting some widefield targets in through the 66.


Salutations!
I bought the same scope second hand and have used it a few times for photography. Quite a versatile ota!
I tried to install a ZWO EAF, but I found the couplers (the silver cylinders) are just a bit too wide and they touch the inside of the hole where normally the focuser knob fits into.
Did you have to adjust anything, or are the couplers with the gemini thinner (smaller diameter)? They look much the same in images.
Thank you for your reply and have a wonderful year’s end!
I did not have to do anything out of sorts. The couplers which were included with the Gemini focuser fit fine. There is a lot more backlash in the Gemini than in the ZWO EAF… but once you get that worked out all performs as expected.
Thanks for stopping by. Have a great holiday and a happy New Year!
Hersey